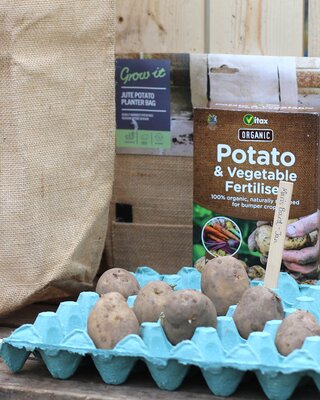
A Guide to Chitting Seed Potatoes

Planning to grow your own potatoes this year? Chances are you may have heard about the process of chitting. Whether you're a seasoned grow-your-own enthusiast, or giving it a go for the first time this year, here are our chitting tips & tricks to give your potatoes the best start possible - before they've even gone in the ground!
What is Chitting and Why Does It Help?
The process of chitting allows seed potatoes to grow sprouts before they're planted, giving them a head start and reducing the amount of time you'll have to wait before they crop (great for more impatient gardeners!). Another benefit to chitting is that it should also help to ensure a better harvest later on.
Buying seed potatoes early is highly recommended to get your preferred varieties before they sell out. Since you'll have your spuds in advance, chitting is an easy step to take to help them on their way before they get in the ground!
When to Chit Seed Potatoes
Seed potatoes should be chitted around 6 weeks before you plan to plant them – so, for many, that will mean chitting in February ready for planting in March/April.
You can chit first and second earlies, and maincrop potatoes, at the same time. To make things easier, you can also plant them all at the same time - but be sure to make a note of what you've planted where, as they will want to come out of the ground at different stages! As a general rule, harvest first earlies in June/July; second earlies can be harvested in July/August; and maincrops in late August/September.
How to Chit Seed Potatoes
Chitting seed potatoes requires little in the way of equipment and is very easy to do: all you'll need is light, heat and some old trays or egg boxes. Next, you'll want to locate the eyes of the potato – small, bumpy indentations in its skin from which sprouts will grow. Place your potatoes, with the most eyes facing upwards, in your egg box or tray (if you're using a tray, scrunch up some newspaper and use it to keep the potatoes standing upright).
Put your seed potatoes in a light, warm, frost free area (around 10°C) - a garage, porch, conservatory or by a bright window in the home will all work well.
Then, it's time to leave the seed potatoes to work their magic! Over the next few weeks, you should see sprouts begin to form at the eyes. These should be short, knobbly, and purple/green in colour; if you're getting long, white sprouts, this probably means your seed potatoes aren't getting enough light.
Tip: If you want larger spuds, don't leave all the sprouts on your potato when you plant it. Instead, remove all but three or four before putting it in the ground. Want more, smaller potatoes? Leave all the shoots intact.
Shop a selection of Seed Potatoes online here
Are you growing your own potatoes this year? We have a wide selection of seed potatoes in the Garden Centre from January to March/April, ready to be chitted and planted for a delicious harvest later this year; please call 015395 63630 for our availability.


